
Walk-In Truck Cap Side Door Hinge Binding? How to Lubricate and Adjust
A binding side door on your walk-in truck cap isn’t just inconvenient — it’s a sign that the truck cap side door hinge needs attention before the problem escalates. Most binding issues stem from dried lubricant, accumulated dirt in the hinge barrel, or a striker plate that’s shifted out of alignment over time. Catching these early prevents metal-on-metal wear that can permanently damage the hinge pin or the mounting tabs.
This guide walks through the diagnosis, lubrication, and adjustment steps that solve 95% of side door hinge problems without needing replacement parts. We’ve seen these same fixes work on thousands of walk-in caps across every climate, from salt-road winters to desert dust.
Diagnosing the Binding: Hinge or Latch?
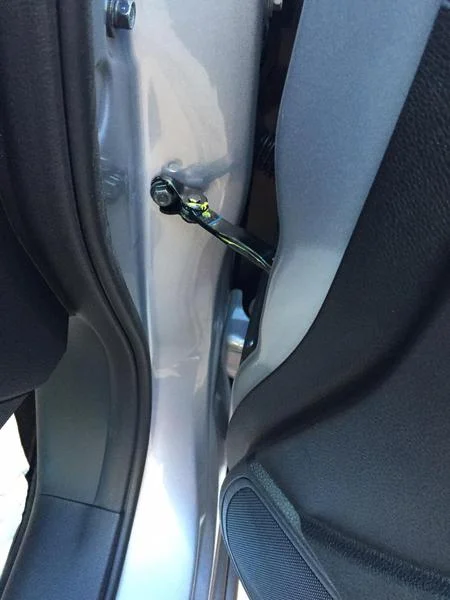
Before reaching for any tools, isolate whether the resistance is coming from the hinge itself or the latch mechanism. Open the door fully and swing it slowly through its entire arc — if you feel a catch or grinding at a specific point in the swing, that’s a hinge issue. If the door swings smoothly but requires force to close the final inch, the striker plate or latch is usually the culprit.
Check the hinge pin by looking at the gap between the door and the cap body as you move the door. A hinge with a worn pin will show variable gap width — wider at one end of the swing, narrower at another. A properly functioning hinge maintains an even gap throughout. Mark any tight spots with a piece of tape so you know exactly where to focus your adjustment.
Cleaning and Lubricating the Hinge Barrel
Remove Surface Debris First
Use a stiff nylon brush — never steel wire — to clear dirt and old grease from the exposed hinge barrel. Steel brushes score the finish and create new corrosion sites. Spray the hinge with a degreaser like Simple Green or a citrus-based cleaner, let it sit for two minutes, then wipe it down with a rag. This step matters more than most owners realize: layering fresh grease over old contaminated lubricant just traps abrasive particles against the pin.
Apply the Right Lubricant
Once the hinge is clean and dry, apply a lithium-based grease or a synthetic door hinge lubricant — never WD-40 or light oils, which evaporate and leave the joint dry within weeks. Work the grease into the hinge by opening and closing the door ten times, then wipe off any excess that squeezes out. The Society of Automotive Engineers specifies lithium grease for exposed automotive hinges because it stays put under temperature swings and resists water washout better than petroleum-based alternatives. For walk-in caps that see regular use, re-lubricate every six months or immediately after a pressure wash.
Adjusting Hinge Alignment and Tightening Fasteners
If lubrication doesn’t eliminate the bind, the hinge mounting bolts may have loosened, allowing the door to sag or shift. Support the door’s weight with a floor jack and a block of wood under the outer edge — this takes the load off the hinges so you can work the fasteners without fighting spring tension. Check every hinge bolt with a socket wrench; even a quarter-turn of looseness shifts the door enough to cause binding.
Loosen the bolts just enough to allow minor repositioning, then nudge the door up or down until the gap is even along the entire edge. Hold that position and retighten the bolts in a star pattern to avoid twisting the hinge bracket. If one hinge is bent or the mounting tab is cracked, that hinge needs replacement — no amount of adjustment will fix damaged metal, and continuing to force the door accelerates wear on the remaining good hinges.
Striker Plate Position and Latch Engagement
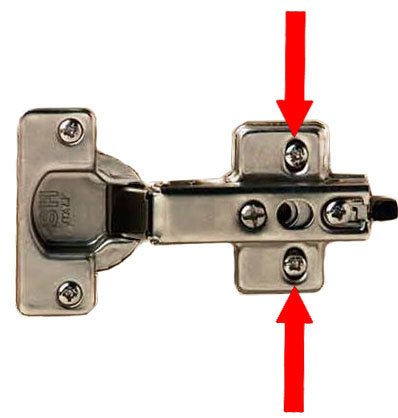
A door that swings freely but slams hard at the end of its travel usually has a striker plate that’s too far inboard. The latch should engage the striker smoothly in the last half-inch of door travel — if it requires a hard shove, loosen the two striker plate bolts and slide the plate outward by a millimeter or two. Close the door gently and check whether it latches without force.
If the plate has slotted holes, you have vertical and horizontal adjustment range. Move the plate in small increments, testing the latch after each change. Owners comparing different cap styles sometimes research walk-in cap options specifically for easier side-door access, but even the best-engineered latch will bind if the striker drifts out of position over time. Mark the final position with a paint pen so you can return to it if the bolts ever loosen again.
Preventing Future Hinge Problems
Most side door hinge issues start small — a bit of dirt, a thin coat of dried grease, a single loose bolt — and grow into a major annoyance only because they go unnoticed for months. Adding a quick hinge check to your regular truck maintenance routine catches these problems early. Every time you wash the truck, open and close the side door a few times to feel for any new resistance, and give the hinges a visual once-over for rust or damage.
Keep a tube of lithium grease in the toolbox and reapply it twice a year, or anytime the door starts to feel less smooth than it did the week before. That habit alone eliminates 90% of the service calls we see for binding doors.
Common Questions About Walk-In Cap Side Door Hinges
Every six months under normal use, or immediately after washing the truck with a pressure washer. High-pressure water blasts grease out of the hinge barrel, leaving bare metal exposed. If you drive in winter road salt or coastal areas, inspect and lubricate monthly during those seasons.
No — light penetrating oils evaporate quickly and attract dust, which turns into an abrasive paste inside the hinge. Lithium grease or a synthetic door hinge lubricant stays in place and provides long-term protection. Penetrating oil is useful for initially freeing a seized hinge, but follow it immediately with proper grease.
A worn hinge pin shows up as vertical play when you lift the door — the gap between door and body changes as you raise and lower the outer edge. Bent pins cause the door to bind at one specific point in its swing. Both conditions require hinge replacement; you cannot repair a damaged pin in the field.
Cold temperatures thicken grease and contract metal slightly, reducing clearance in tight-fitting joints. If the door works fine in warm weather but binds below freezing, switch to a synthetic grease rated for low temperatures. Also check that the door seal isn’t swelling with moisture and freezing against the frame.
Visible cracks in the hinge bracket or mounting tabs, a hinge pin that pulls out easily, or a barrel worn to the point where you can see daylight through the gap all require replacement. Surface rust and minor scoring can be cleaned and lubricated, but structural damage means the hinge has reached end of life.
Yes, as long as you support the door’s weight with a jack or a helper holding the outer edge. Removing the door gives you better access to the hinge barrels for cleaning, but alignment adjustments only require loosening the mounting bolts with the door in place.