
LEER 100XL Rear Door Won’t Latch Properly? Here’s How to Adjust and Fix Misaligned Striker Plates
A LEER 100XL door latch that refuses to click shut—or pops open during highway driving—usually points to one of three culprits: a striker plate that’s drifted out of alignment, weatherstripping that’s compressed unevenly after years of use, or a catch assembly that’s worked loose from its mounting bolts. We’ve walked hundreds of truck owners through this fix, and in most cases you’ll have full function back in under thirty minutes with nothing more than a 10mm socket, a flat-blade screwdriver, and a few test-fit cycles.
This guide covers how to diagnose which component is causing the problem, the exact sequence for adjusting the striker plate without bending the frame, and what to do when adjustment alone won’t restore a secure close. Whether you installed your cap last month or inherited it with the truck five years ago, the same geometry principles apply—and once you understand how the latch and striker meet, future tweaks take five minutes instead of half a Saturday.
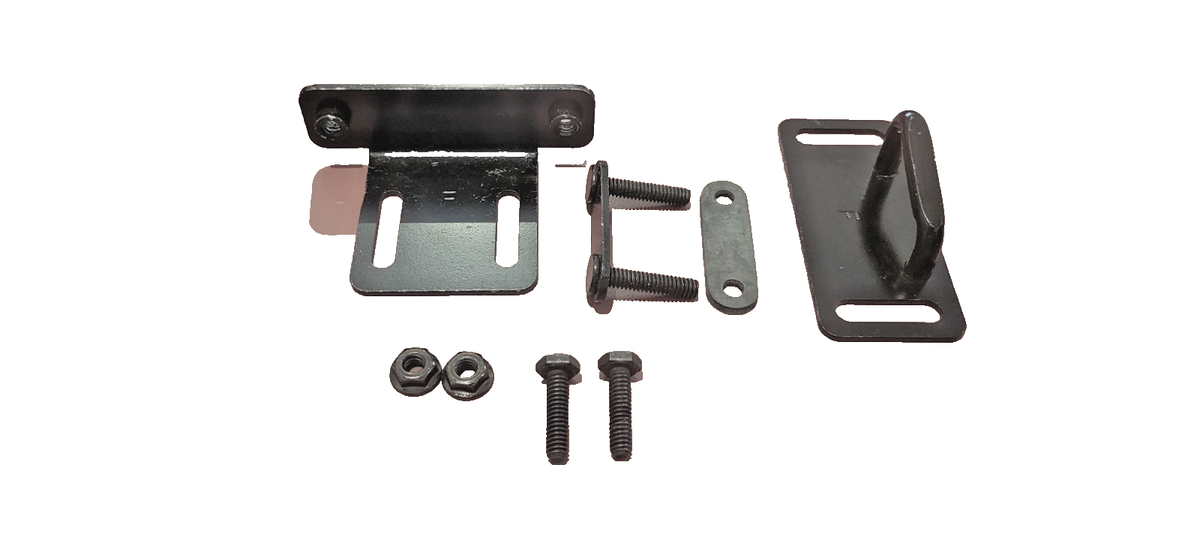
How the LEER 100XL Latch and Striker System Works Together
The rear door on a LEER 100XL uses a rotary latch mounted to the door’s inner skin and a U-shaped striker plate bolted to the cap’s rear frame rail. When you close the door, the latch’s hook rotates around the striker’s loop and pulls the door tight against the weatherstripping—compression is what creates the weatherproof seal, not just contact.
If the striker sits even three millimeters too far inboard, the latch hook can’t fully capture it, leaving a gap you’ll see along the bottom edge of the door. If the striker is too far outboard, the latch may catch but won’t compress the seal, so water sneaks in during a car wash. Vertical misalignment—striker too high or too low—prevents the hook from engaging at all, and you’ll feel the handle flop with no resistance.
Factory installation aims for a striker position that compresses the door seal about fifty percent when latched. Over time, seal compression changes, the cap frame flexes slightly under load, and the striker bolts can shift if they were never torqued to spec—any of those throws off that original fifty-percent target.
Step One: Confirm the Striker Plate Is the Problem (Not the Latch Itself)
Before you touch a wrench, open the door fully and look at the latch mechanism on the door’s edge. Press the release handle and watch the hook move—it should rotate smoothly with no grinding or sticking. If the hook binds or won’t return to the open position, the latch internals are worn and adjustment won’t help; you’ll need a replacement latch assembly.
Next, close the door slowly by hand and watch where the latch hook meets the striker loop. If the hook slides past the striker without catching, or if it catches but the door still sits proud of the frame by more than an eighth of an inch, the striker is out of position. A properly aligned striker should allow the latch to pull the door flush with no visible gap along the bottom or sides.
One quick test: tape a piece of masking tape across the striker plate, then close and latch the door. Open it and check the tape for a clear indentation from the latch hook. If the indentation is off-center or missing entirely, you’ve confirmed misalignment—and that’s a fifteen-minute fix.
Adjusting the Striker Plate for a Flush, Secure Close
Loosen—but don’t remove—the two bolts holding the striker plate to the frame rail. You want them loose enough that the plate can slide in its slotted holes, but not so loose that it flops around. Most LEER caps use 10mm hex-head bolts; a quarter turn past snug is usually enough.
Close the door gently and let the latch hook guide the striker into the correct position. You’ll feel the plate shift as the hook pulls it inboard. Hold the door closed with one hand, then reach inside the cap and snug the striker bolts finger-tight while the door is still latched. Open the door, check the alignment, and if the door now sits flush with no gaps, torque the bolts to fifteen foot-pounds with a torque wrench.
If the door still won’t latch after this adjustment, the striker may need to move vertically. Loosen the bolts again, slide the striker up or down in the slot by a few millimeters, then repeat the close-and-hold test. It’s normal to go through two or three cycles before you land on the sweet spot—patience here saves you from stripping threads or bending the frame.

What to Do When the Weatherstripping Is Too Compressed or Torn
Even a perfectly aligned striker won’t solve a latch problem if the door seal has compressed flat or torn away from its channel. Run your finger along the entire perimeter of the door seal—if you find sections that are half the thickness of the rest, or if the rubber has pulled out of the aluminum channel, the seal is no longer doing its job.
Compressed seals cause two issues: the latch has to travel farther to engage the striker, which can put it at the edge of its adjustment range, and the door no longer compresses evenly, so one corner may latch while another stays proud. If more than a quarter of the seal shows visible compression or damage, plan to replace the entire run—partial replacement creates uneven pressure and you’ll be back adjusting the striker again in six months.
Replacement weatherstripping for the LEER 100XL comes in a continuous length with a T-bulb profile that slides into the door frame’s channel. Pull the old seal out, clean the channel with isopropyl alcohol, and press the new seal in starting at the top center and working toward the corners. Once the new seal is seated, you may need to re-adjust the striker slightly outboard to account for the fresh, thicker rubber.

When to Replace the Striker Plate or Latch Assembly
If the striker plate shows visible bending, cracks around the bolt holes, or rust that’s eaten through the zinc coating, adjustment won’t restore a secure close—you need new hardware. A bent striker can’t be straightened reliably; even if you get it flat again, the metal’s fatigued and will bend again under normal use.
Similarly, if the latch hook is visibly worn—look for rounded edges or a groove worn into the metal where it contacts the striker—the geometry is compromised and no amount of striker adjustment will give you a solid click. Both parts are available as service items and install with the same bolt patterns as the originals, so swapping them is straightforward.
When replacing either component, clean the mounting surfaces thoroughly and apply a thin bead of marine-grade grease to the latch pivot and the striker loop. This keeps corrosion from locking things up and ensures smooth operation through winter road salt and summer humidity. Owners of the LEER 100XL and 180 models report near-identical latch geometry, so troubleshooting steps transfer directly between the two if you’re comparing cap options or helping a friend diagnose their own door issue.
Keeping Your LEER 100XL Rear Door Secure for the Long Haul
A rear door that won’t latch isn’t just annoying—it’s a security risk and a fast way to soak your gear during a rainstorm. Most latch problems on the LEER 100XL trace back to a striker plate that’s drifted a few millimeters out of position, and bringing it back into spec takes less time than a trip to the hardware store.
Once you’ve dialed in the striker adjustment, test the door through a full week of daily use before calling it done. Temperature swings, load shifts, and even the way you close the door can reveal small issues you didn’t catch during the initial test cycles. If you find yourself re-adjusting every few months, inspect the weatherstripping and the latch internals for wear—chronic misalignment usually points to a worn component that adjustment can’t fix indefinitely.
Keep a 10mm socket and a small tube of marine grease in your truck’s toolkit. Periodic lubrication of the latch pivot and striker loop prevents the kind of corrosion and binding that turns a five-minute adjustment into a full hardware replacement.
Common Questions About LEER 100XL Latch Failures and Striker Adjustments
This usually means the latch is catching the very edge of the striker loop but not pulling it fully into the locked position. Road vibration shakes it loose. Adjust the striker plate inboard by two to three millimeters so the latch hook has full engagement, not just edge contact.
The latch assembly is fixed to the door with rivets and has no adjustment slots. All position changes happen at the striker plate, which has slotted mounting holes for vertical and horizontal movement. If the latch mechanism is damaged, replacement is the only fix.
Press the seal with your thumb—if it compresses easily and bounces back, it’s still good. If it stays flattened or you see cracks and tears, replace it. A door that latches but leaks water points to failed weatherstripping, not striker misalignment.
Fifteen foot-pounds is the factory recommendation for the 10mm bolts used on most LEER caps. Over-torquing can strip the threads in the aluminum frame, and under-torquing lets the striker shift again after a few weeks of use.
Yes. If the latch hook only catches the striker at an angle, repeated use wears a groove into both parts. You’ll eventually need to replace both the latch and the striker, whereas catching the problem early only requires a fifteen-minute adjustment.
Loosen and snug the bolts by hand or with a hand ratchet. A power drill makes it too easy to over-tighten and strip the aluminum threads. Save the drill for drilling out stripped bolts if you’ve already made that mistake.